Dining in
The house is a WWII era Cape Cod. The original floor boards were stamped "Victory White Oak". Over the years, there have been additions and updates and as I a mentioned in my previous post, a complete renovation 10 years ago after a fire.
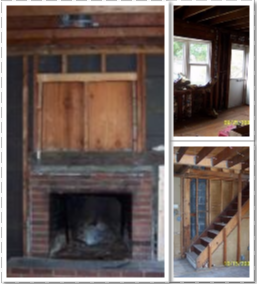
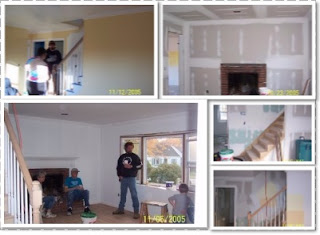


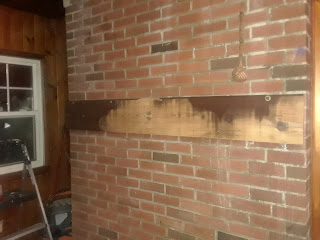
We stripped the walls to the studs, replaced floors and windows and we also opened up the staircase to the second floor. As you can see below, the fireplace was once a window. The bay window on the front of the house was also a later addition to the house. This room was also the Living Room for most of its existence. I set up a folding table in there for Easter brunch one year and realized that it really wanted to be a dining room, so I went with it.

Ater 10 years, toddlers to teens, and autism times 3, our lovely dining room has really taken a beating. literally. So, regardless of the damage, regardless of my eggs, it is time for a new look. After spending what was probably too much time on Pinterest, I came up with the following vision for the room. Actually, credit for the color scheme goes to my 13yo son! 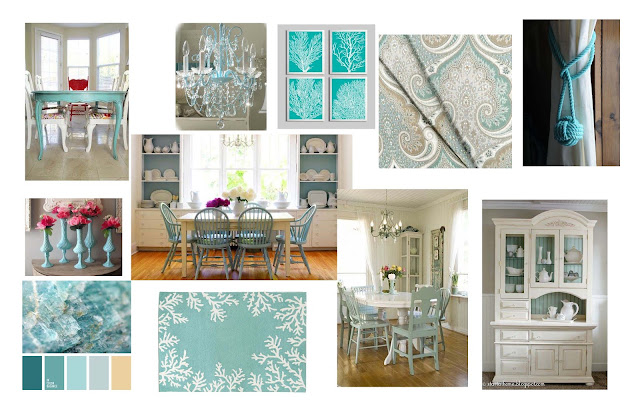

The big holes in the walls are fixed, but I've still got the small ones to patch and I was impatient to get painting, so I started with the furniture. The hutch and table were my grandmother's. The chairs are also mid-century hand-me-downs. Grammy found the hutch in a barn somewhere and he had it long before I came around. I don't know anything about it beyond that. at least one of my children decided to teethe on one corner (WHY did it put the high chair there?!) and the laminate on the bottom of the sides is peeling. I suppose I could have done something with the laminate, but I did sand out the gnaw marks! The table is a lovely, well made and well loved solid maple piece. It was hard to bring myself to paint it, but I can always strip it and stain it in the future. The chairs will get spray paint simply because it is easier that way. The hutch will be similar to the one above. The table will be the Tiffany blue and the chairs white. Everything will get a few coats of Polycrylic for durability.
After I took these, I started sanding and priming. Stay tuned for the finished pieces! Then we can tackle the walls, lighting ... and maybe do something with that floor!
Comments
Post a Comment